Implementation Steps
Step 1: Set up VPC Private Network and EC2 Servers
Process for building an isolated network environment and core compute servers:
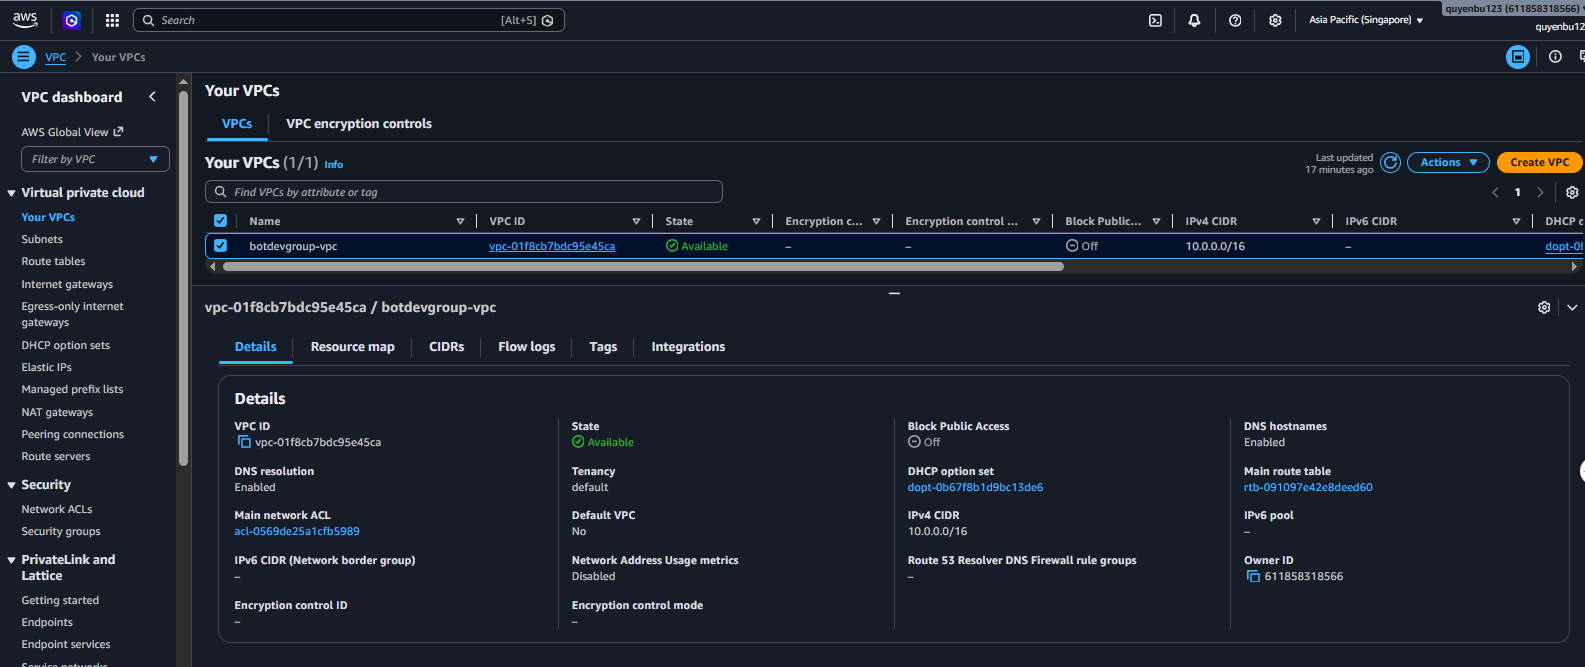
- Initialize a VPC with CIDR block 10.0.0.0/16 as the primary private network range.

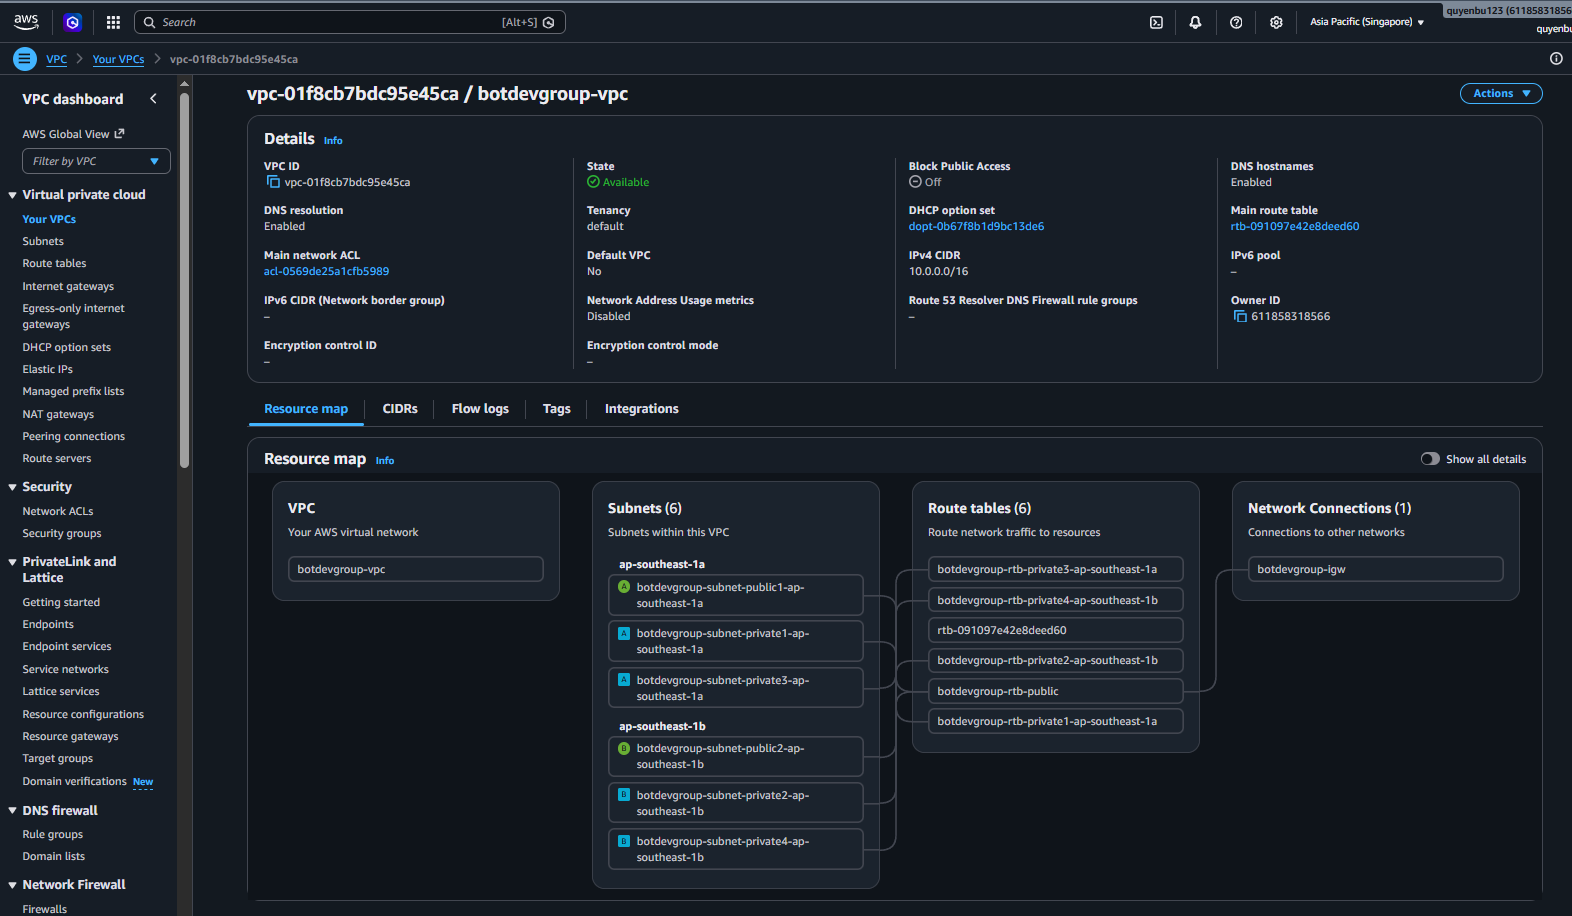
- Divide subnets into Public Subnets (where ALB and NAT Gateway reside for direct Internet access) and Private Subnets (where EC2 API and Worker servers are placed for complete isolation from the Internet Gateway).
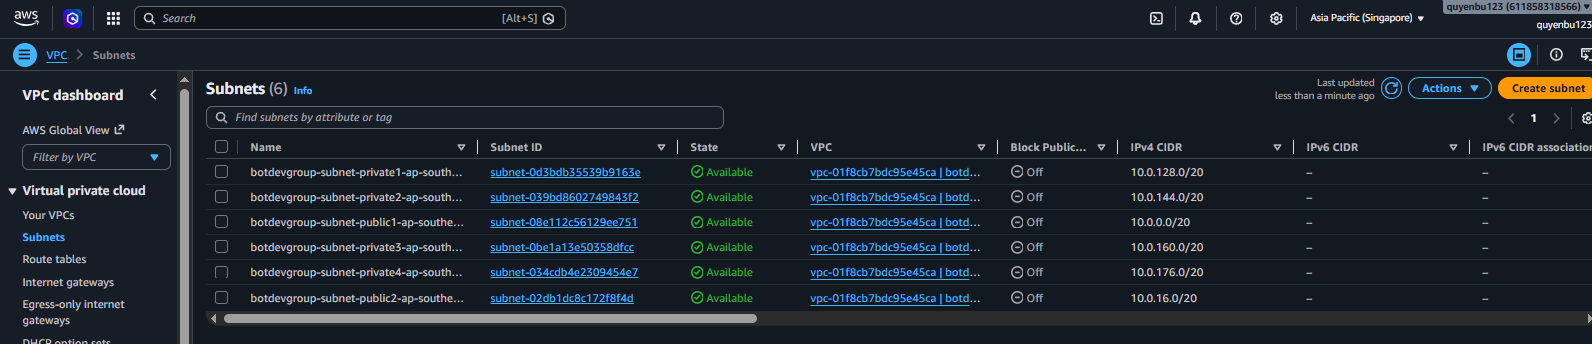
- Configure corresponding Route Tables for Public Subnets pointing to the Internet Gateway, and Private Subnets routing outbound traffic through the NAT Gateway located in the Public Subnet.
- Deploy a t3.micro EC2 instance in the Private Subnet running Amazon Linux 2023. Install Docker and Docker Compose to manage and operate the Spring Boot backend application.

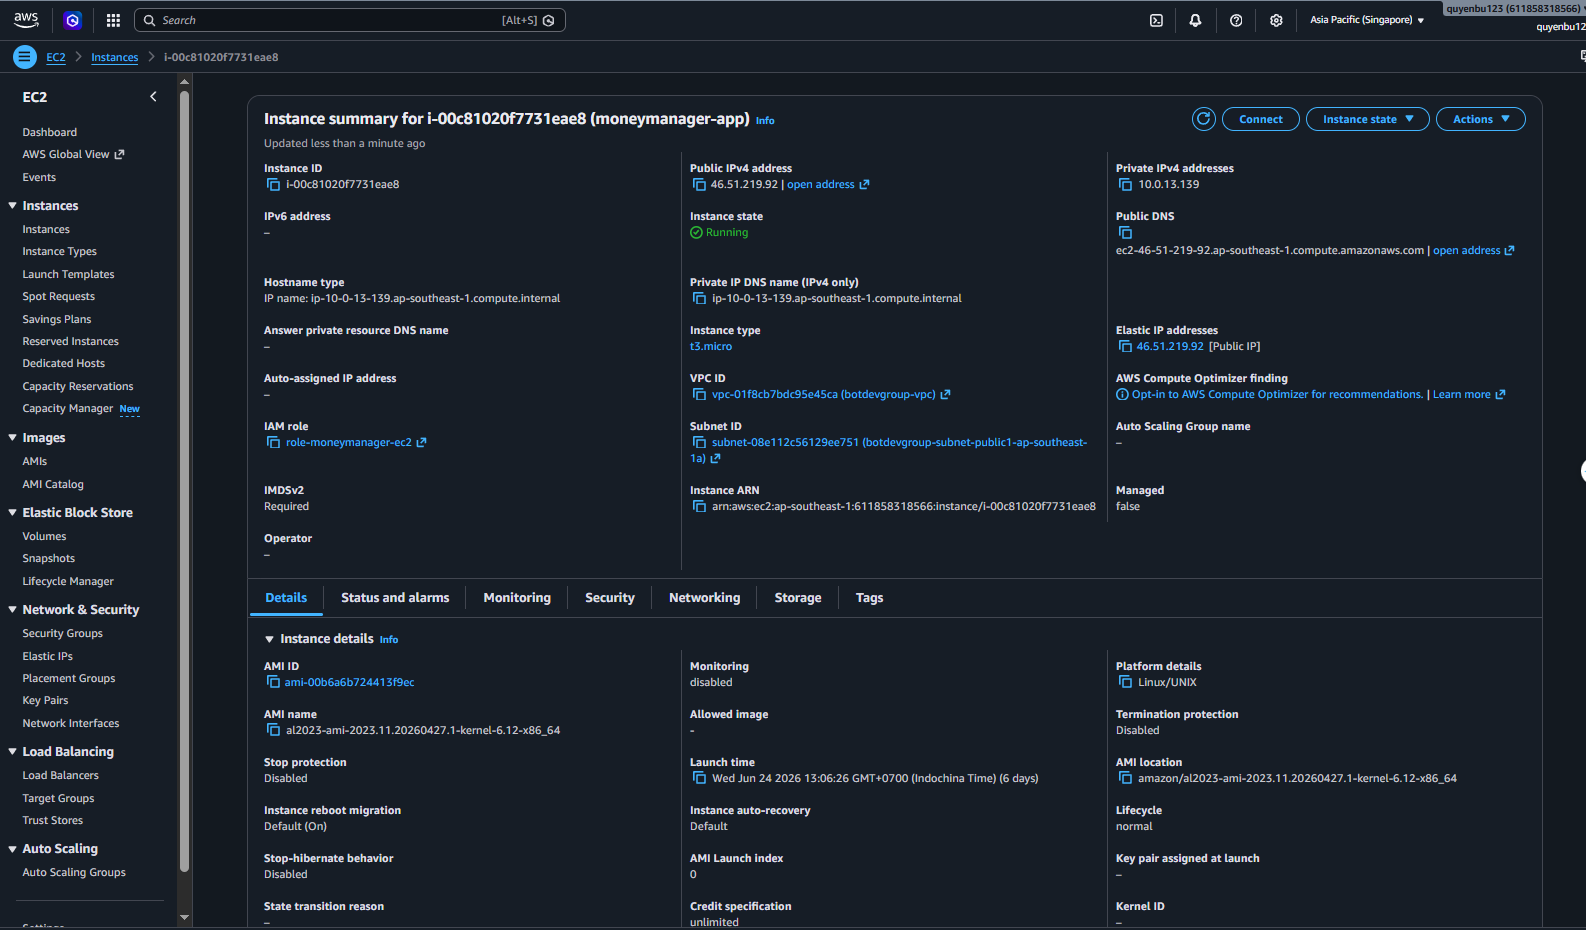
- The Spring Boot backend is split into two independently running containers: moneymanager-api handles HTTP/REST API requests on port 8080 (ALB receives HTTPS traffic from outside and forwards it here), and moneymanager-worker consumes messages from the SQS queue and performs periodic background tasks without opening any external ports.
- The environment configuration file /app/.env is stored directly on the EC2 instance’s EBS volume for security, injecting environment variables directly into containers at startup.
Step 2: Configure RDS MySQL and ElastiCache Redis
Deploy the relational database storage subsystem and high-speed cache:
- Initialize an RDS MySQL 8.0 database, db.t3.micro size. This database is placed in a Subnet Group spanning the VPC’s Private Subnets to completely prevent external access.

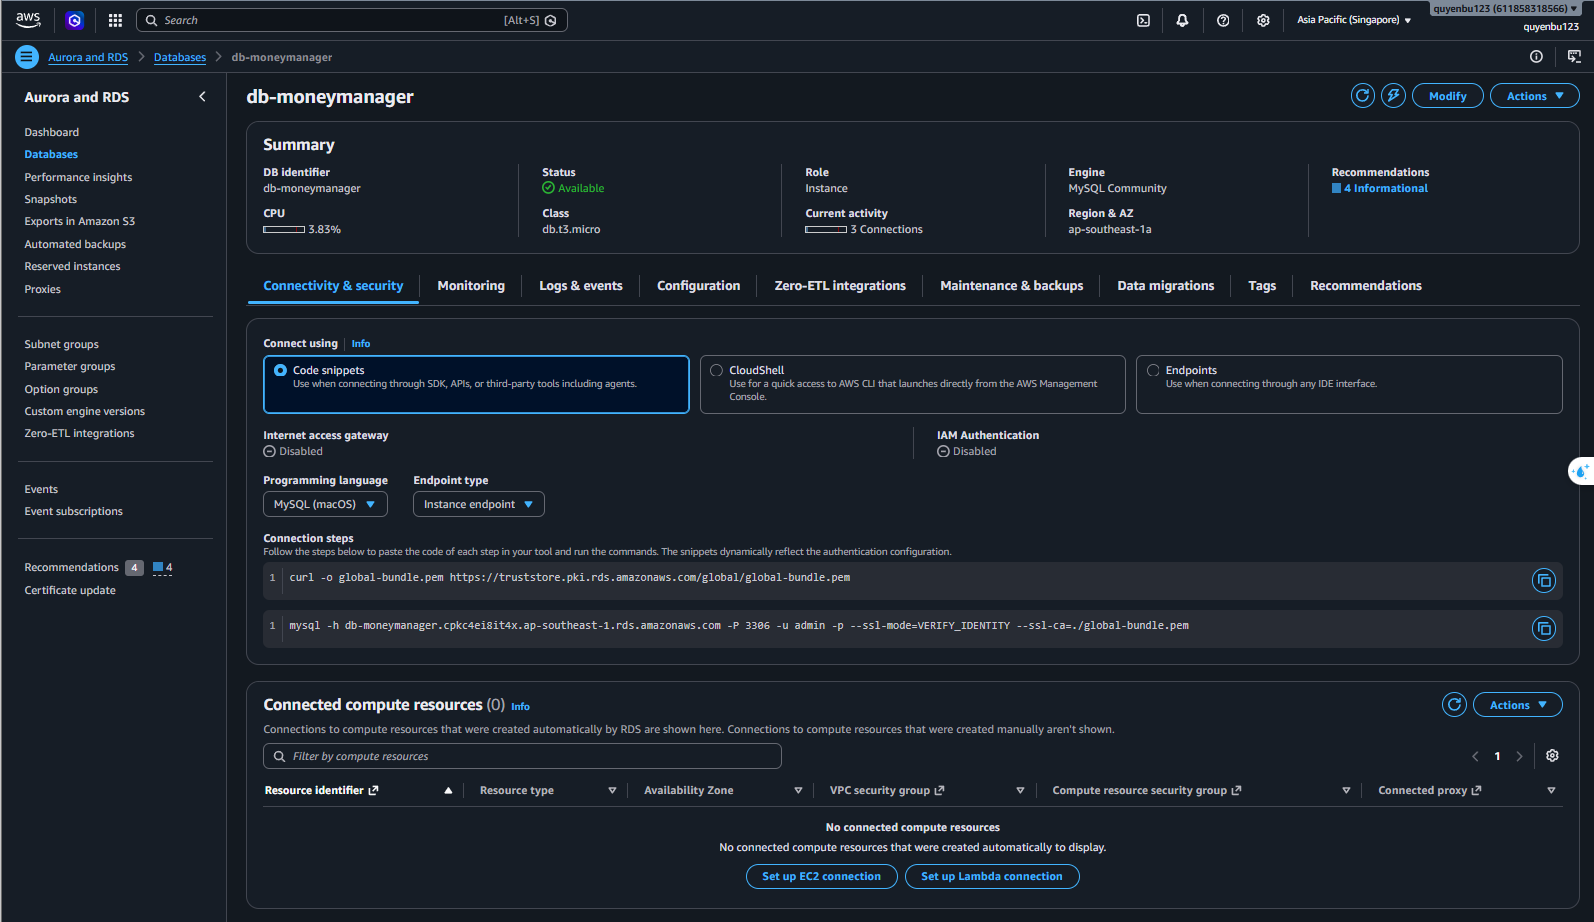
- The RDS MySQL Security Group is configured with full blocking mode, only allowing TCP query requests originating from the EC2 API server’s security group on default port 3306. The API server connection uses Hibernate JPA to automatically update database table schemas based on Java Entity classes.
- Initialize an ElastiCache Redis cluster with cache.t3.micro node size running in the Private Subnet partition. The Redis Security Group is configured to only accept internal network connections on port 6379 from the EC2 API.
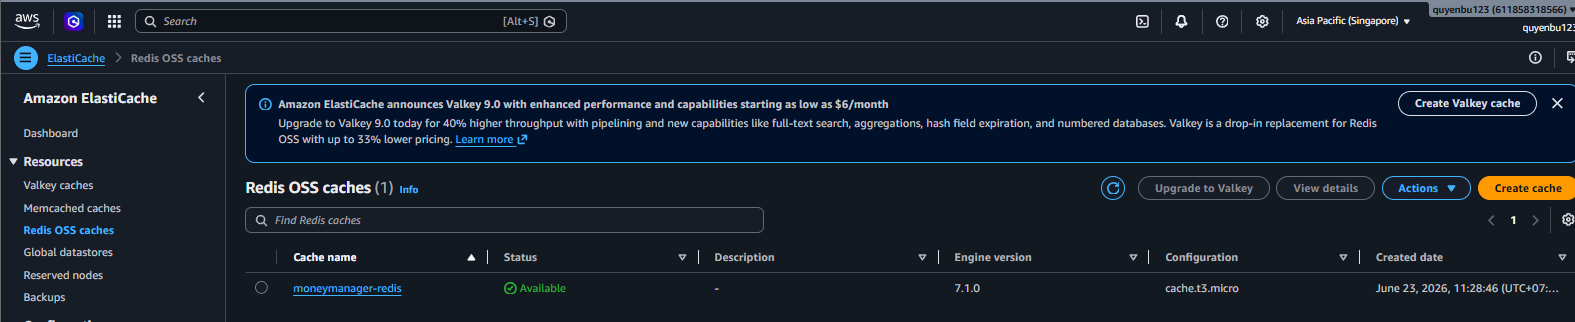
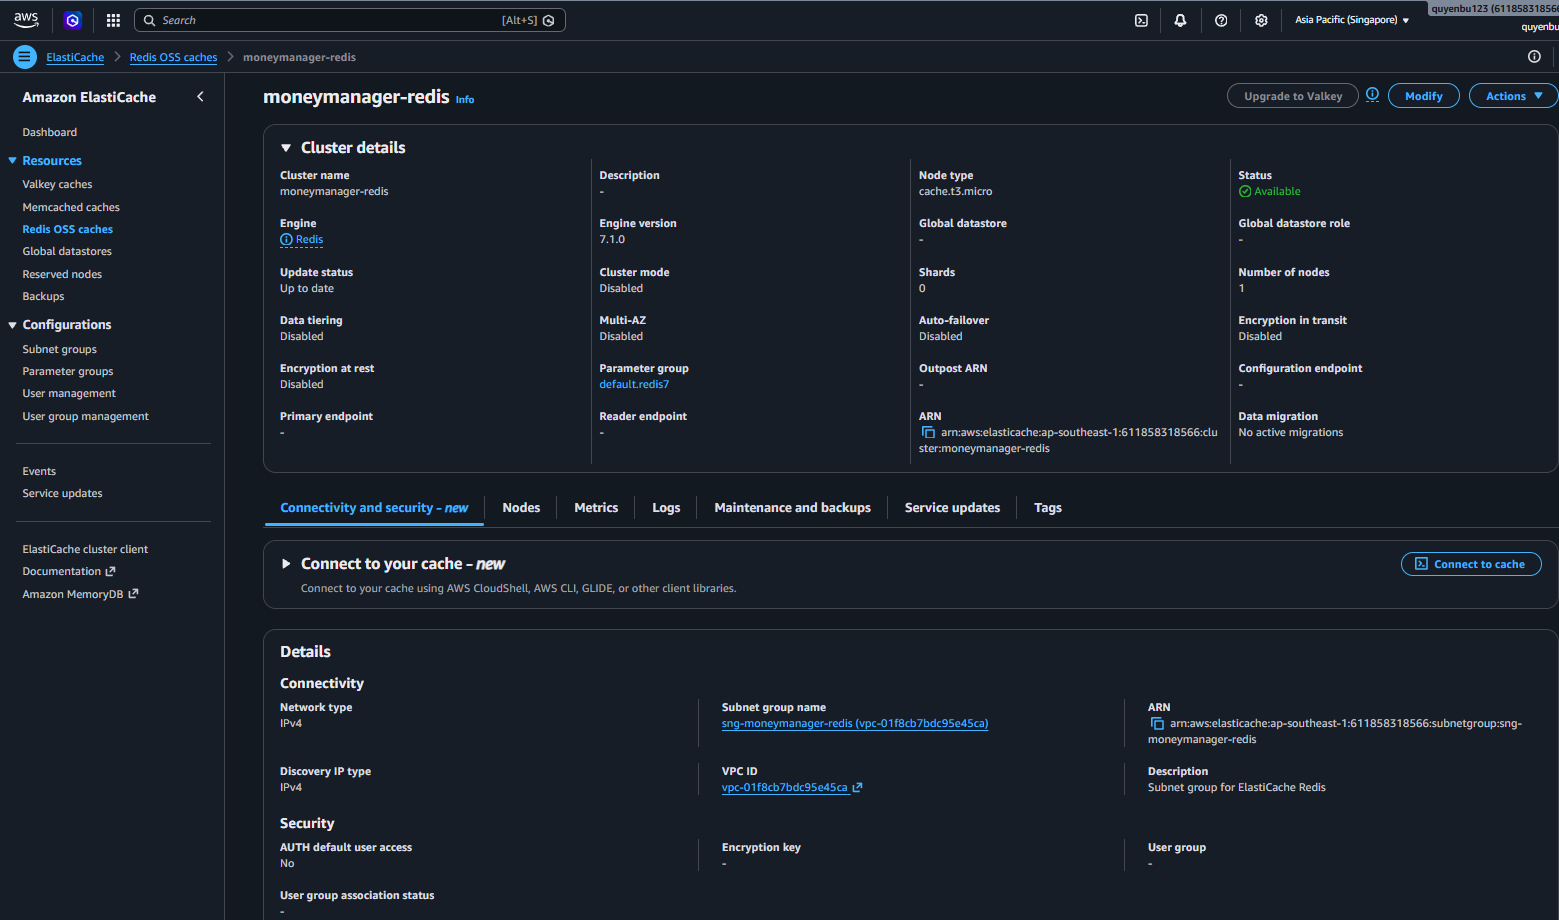
- Spring Boot API uses Redis as a data caching layer for infrequently changed resources to reduce MySQL IO query load, while also running a Rate Limiting algorithm for Nova Money AI assistant chat conversations to prevent spam attacks that could deplete API keys.
Step 3: Integrate Amazon DynamoDB and AWS SQS
Set up NoSQL unstructured storage and an event-coordinating message queue system:
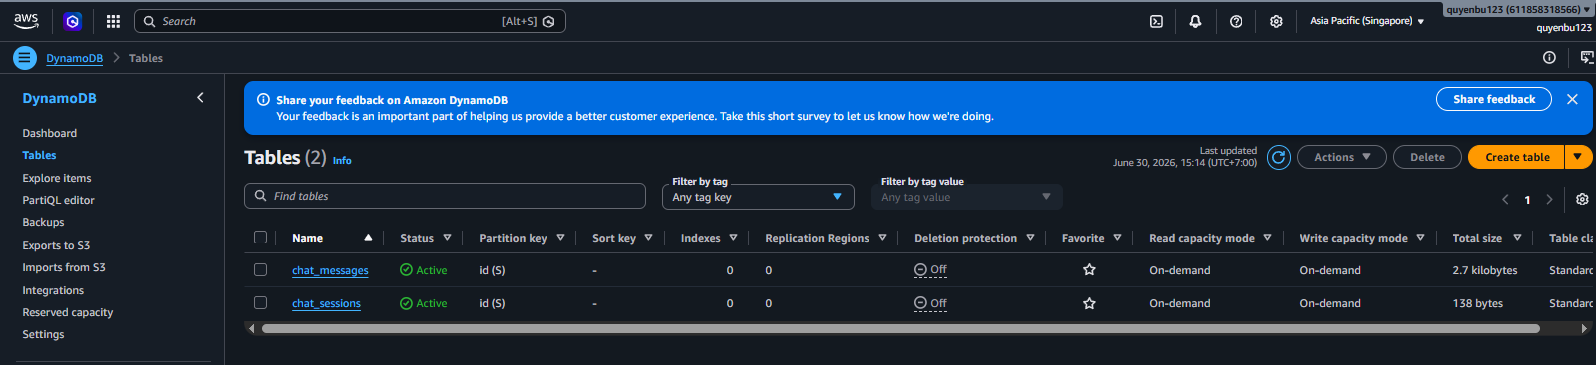
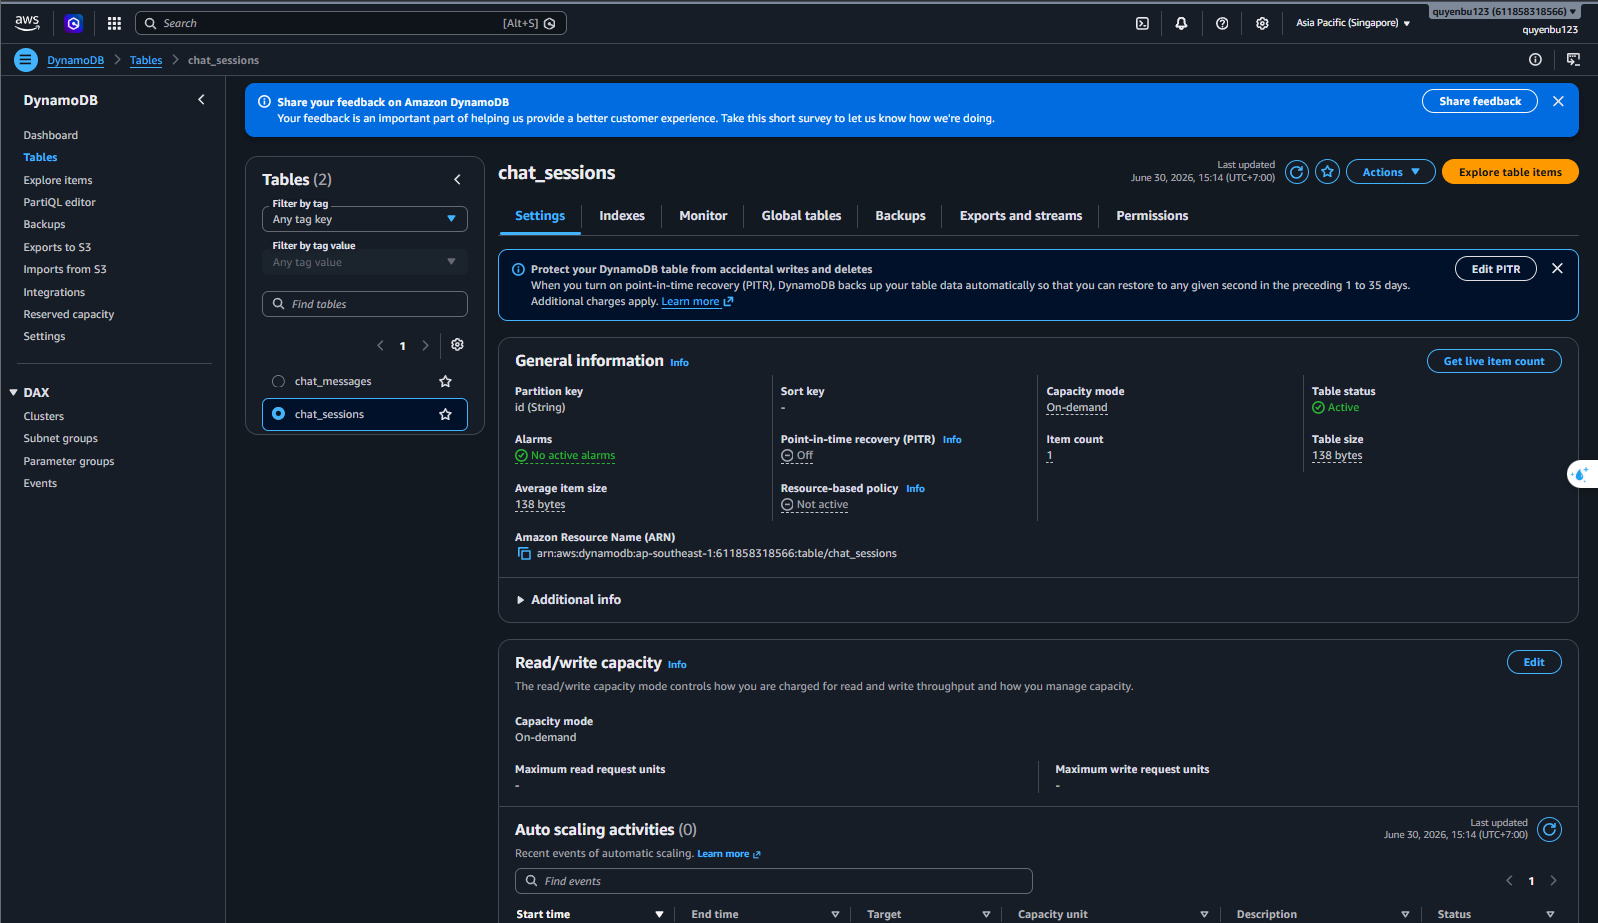
- On the DynamoDB Console, create two main tables with On-Demand Capacity Mode: chat_sessions table storing chat session info (Partition key: id, String type) and chat_messages table storing detailed message history (Partition key: id, String type).
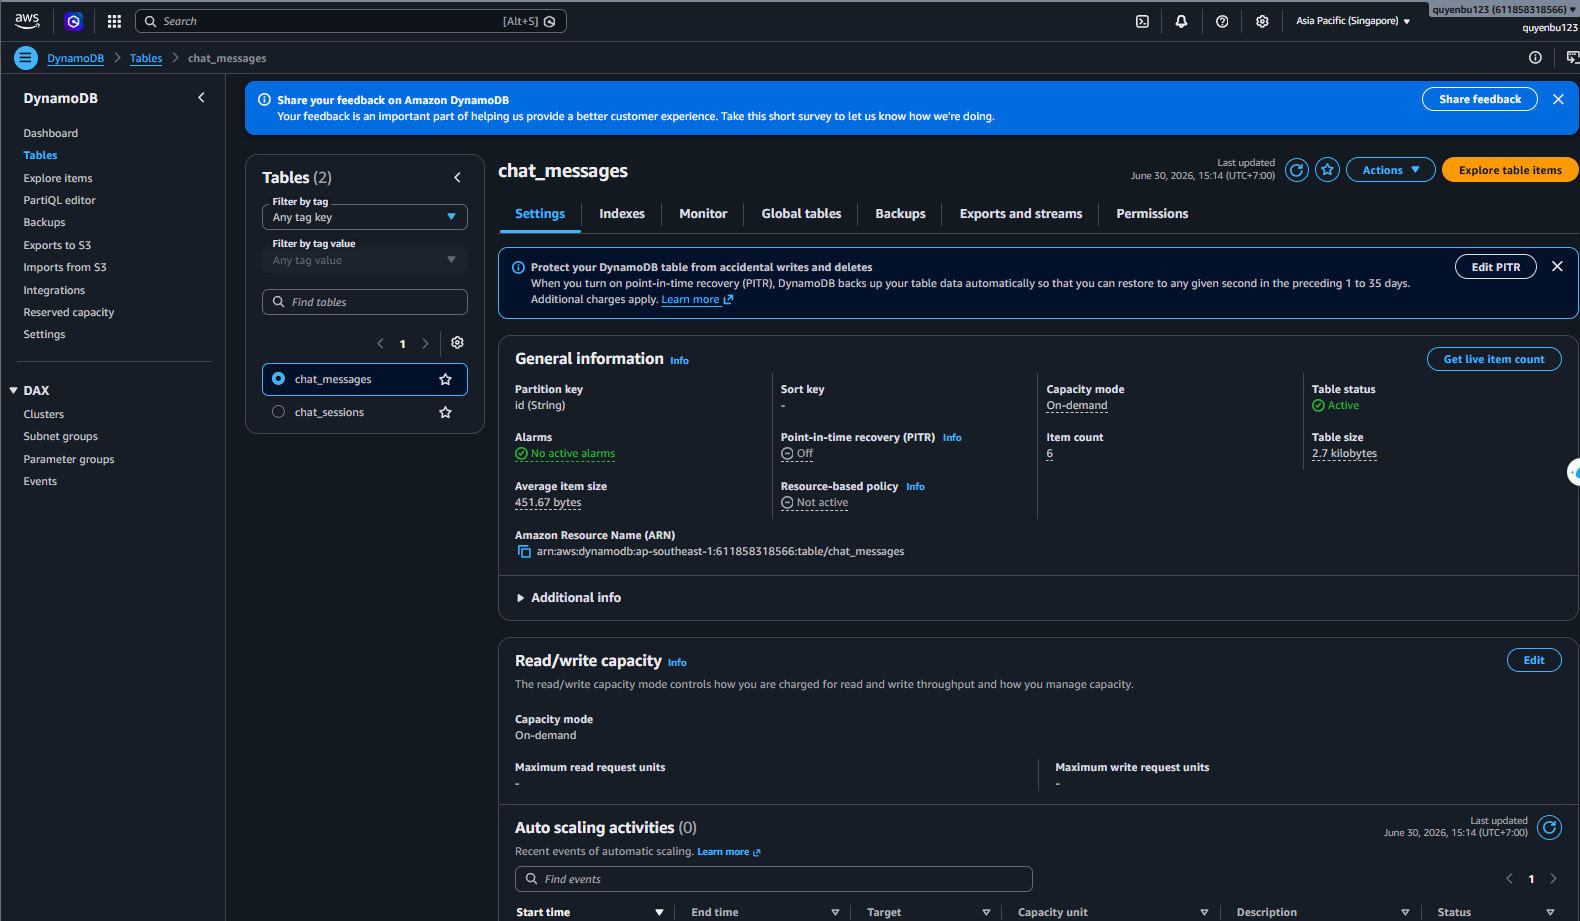
- Assign DynamoDB read/write permissions to EC2 via IAM Instance Profile. In the Spring Boot backend source code, remove the old MongoDB Atlas connection library, integrate the AWS SDK v2 for DynamoDB, and configure a DynamoDbClient bean pointing to the Singapore region to store Nova Money virtual assistant conversation history efficiently and cost-effectively.
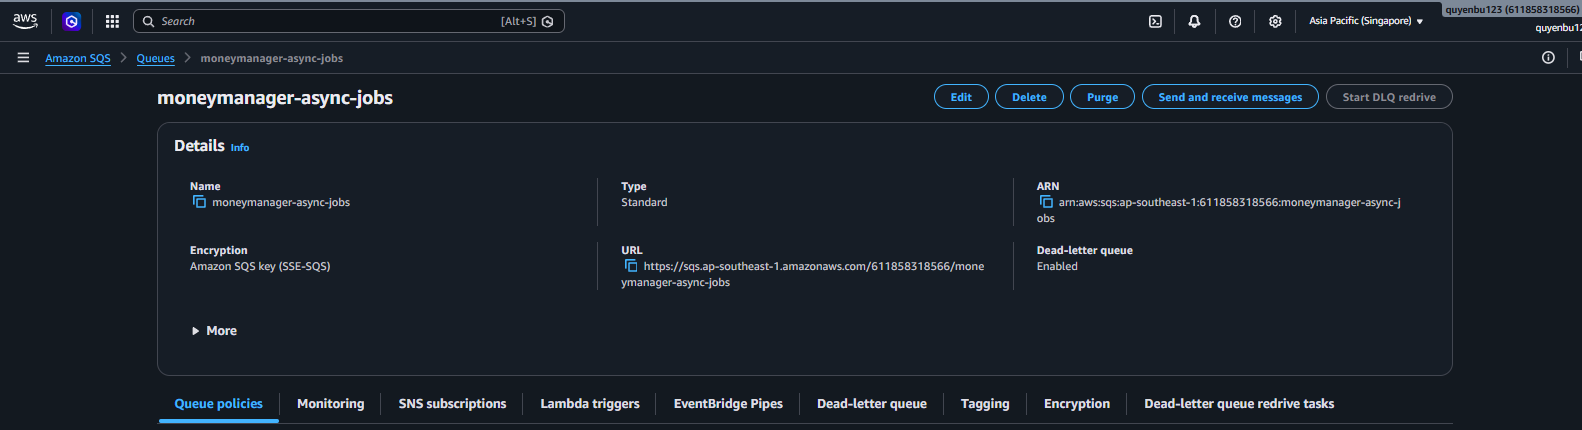
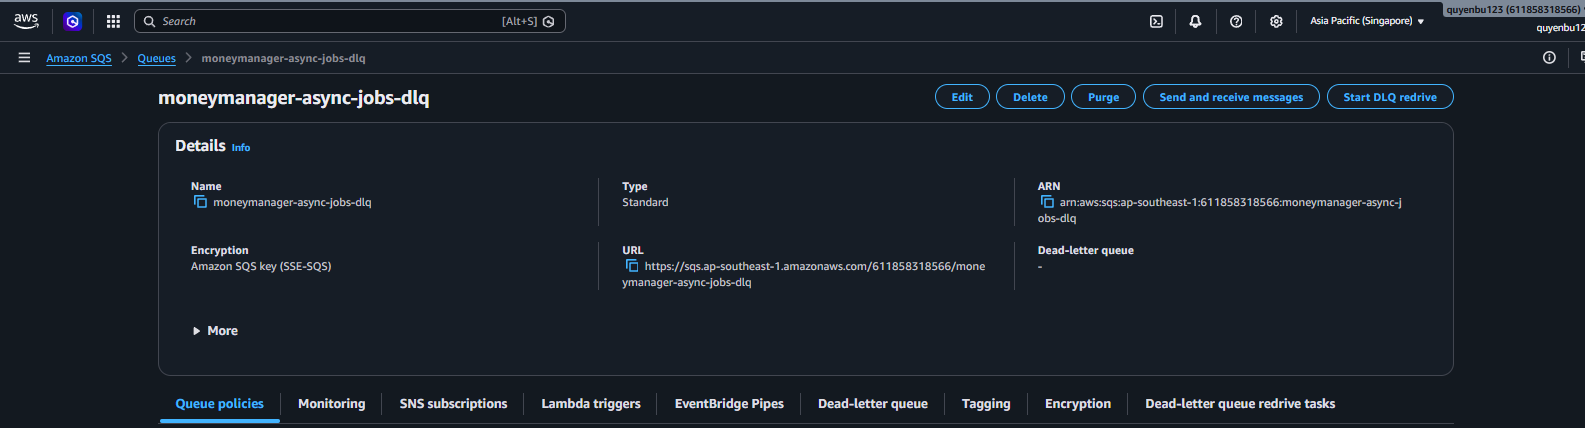
- Create a standard AWS SQS queue named moneymanager-async-jobs. To handle messages that fail after multiple retries, configure a Dead Letter Queue (DLQ) named moneymanager-async-jobs-dlq linked to the main queue via a Redrive Policy with a maximum of 3 retries.

- In the backend application, when a user performs a large financial transaction, the API container serializes the event data into a JSON string and uses the SqsTemplate object to push the event into SQS. The Worker container uses the @SqsListener annotation to listen to SQS and asynchronously execute tasks such as sending notification emails and recalculating budget jar limits without affecting the user’s API response time.
- The IAM Role attached to the EC2 server is granted only the necessary SQS permissions, following the least-privilege principle:
{
  "Version": "2012-10-17",
  "Statement": [
    {
      "Effect": "Allow",
      "Action": [
        "sqs:SendMessage",
        "sqs:ReceiveMessage",
        "sqs:DeleteMessage",
        "sqs:GetQueueAttributes"
      ],
      "Resource": "arn:aws:sqs:ap-southeast-1:123456789012:moneymanager-async-jobs"
    }
  ]
}
Step 4: Set up Amazon S3 Security and VPC Endpoints
Establish private network connections optimizing latency and cost for S3 connectivity:
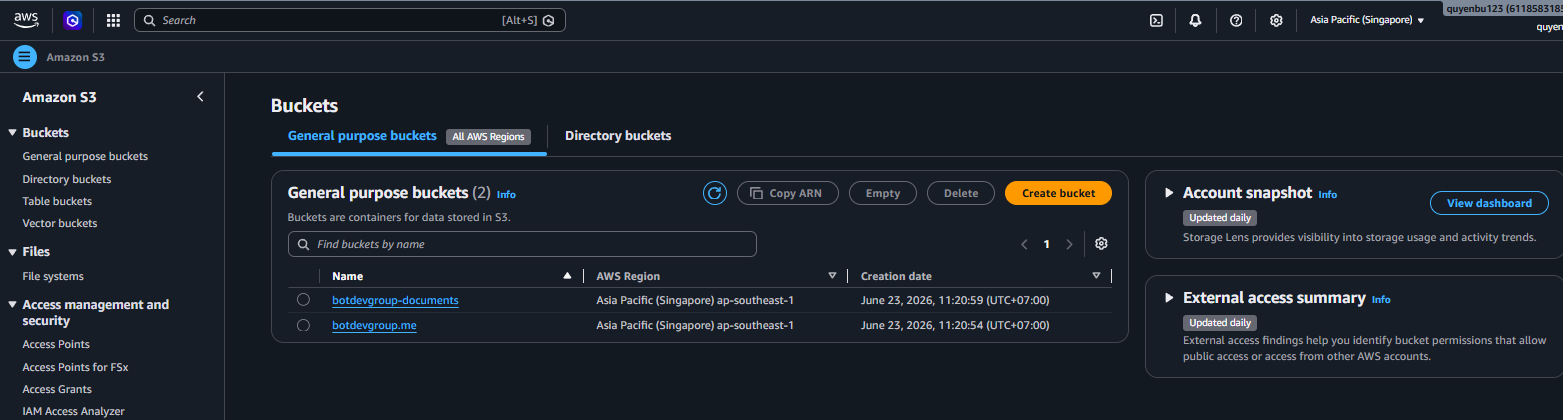
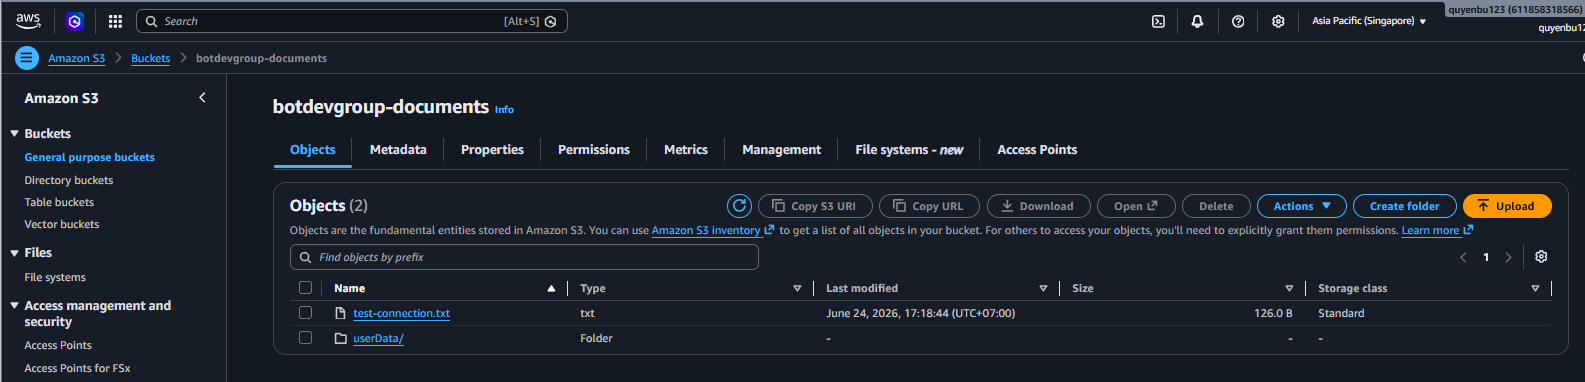
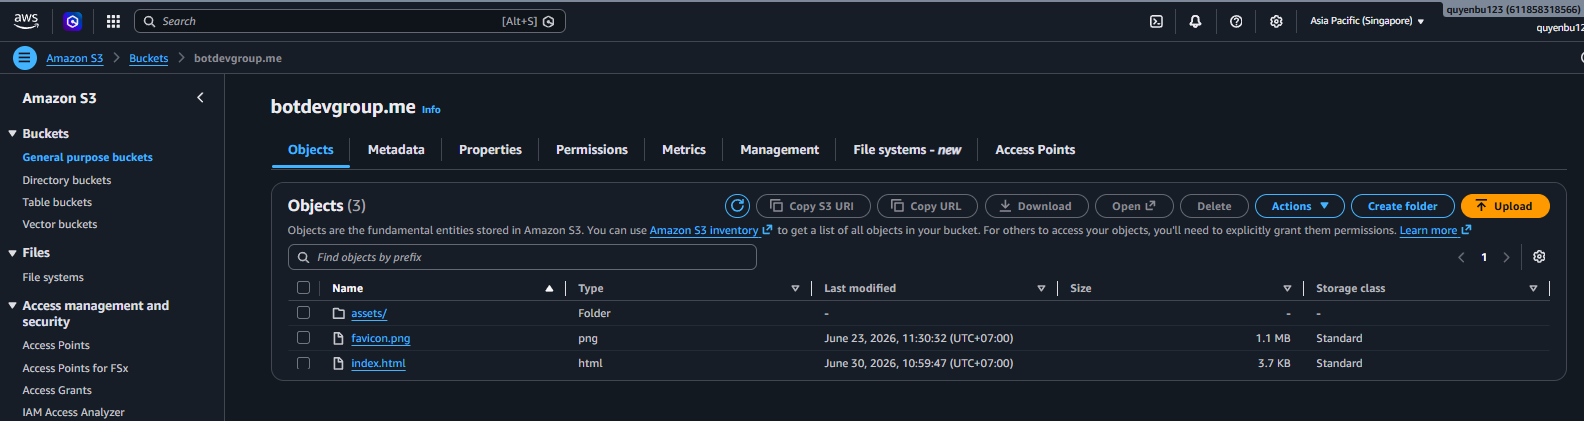
- Create an Amazon S3 Bucket named botdevgroup-documents in fully private mode (Block Public Access) with SSE-S3 encryption enabled.
- Create a Gateway VPC Endpoint for S3 and attach it to the Route Table of the Private Subnets in the VPC. The newly added route automatically directs all EC2-to-S3 traffic through AWS’s internal network backbone instead of traversing the NAT Gateway to the Internet, cutting 100% of NAT Gateway bandwidth processing costs for S3 traffic and improving file transfer speeds. The Endpoint is created using the AWS CLI command and directly attached to the Private Subnets’ Route Table:
aws ec2 create-vpc-endpoint \
  --vpc-id vpc-0123456789abcdef0 \
  --vpc-endpoint-type Gateway \
  --service-name com.amazonaws.ap-southeast-1.s3 \
  --route-table-ids rtb-0123456789abcdef0
- Create an Interface VPC Endpoint (AWS PrivateLink) in Private Subnets across two different Availability Zones for high availability. This Interface Endpoint allocates private internal IP addresses from the VPC.
- Configure an Inbound Resolver in the Route 53 DNS service to listen for requests from external networks (VPN-connected office), resolving S3’s public domain name to the internal IP addresses of the Interface Endpoint ENIs, enabling office workstations to securely upload invoices or download reports over VPN.
- Configure Endpoint Policies on both VPC Endpoints to only allow upload/read operations targeting the Money Manager project’s S3 Bucket, preventing data leakage. Additionally, configure an S3 Bucket Policy to absolutely deny all S3 access requests from outside that do not go through the two valid VPC Endpoints.
Step 5: Configure CloudWatch Monitoring and Alarms
Set up centralized monitoring for the EC2 API/Worker server cluster and dependent services:
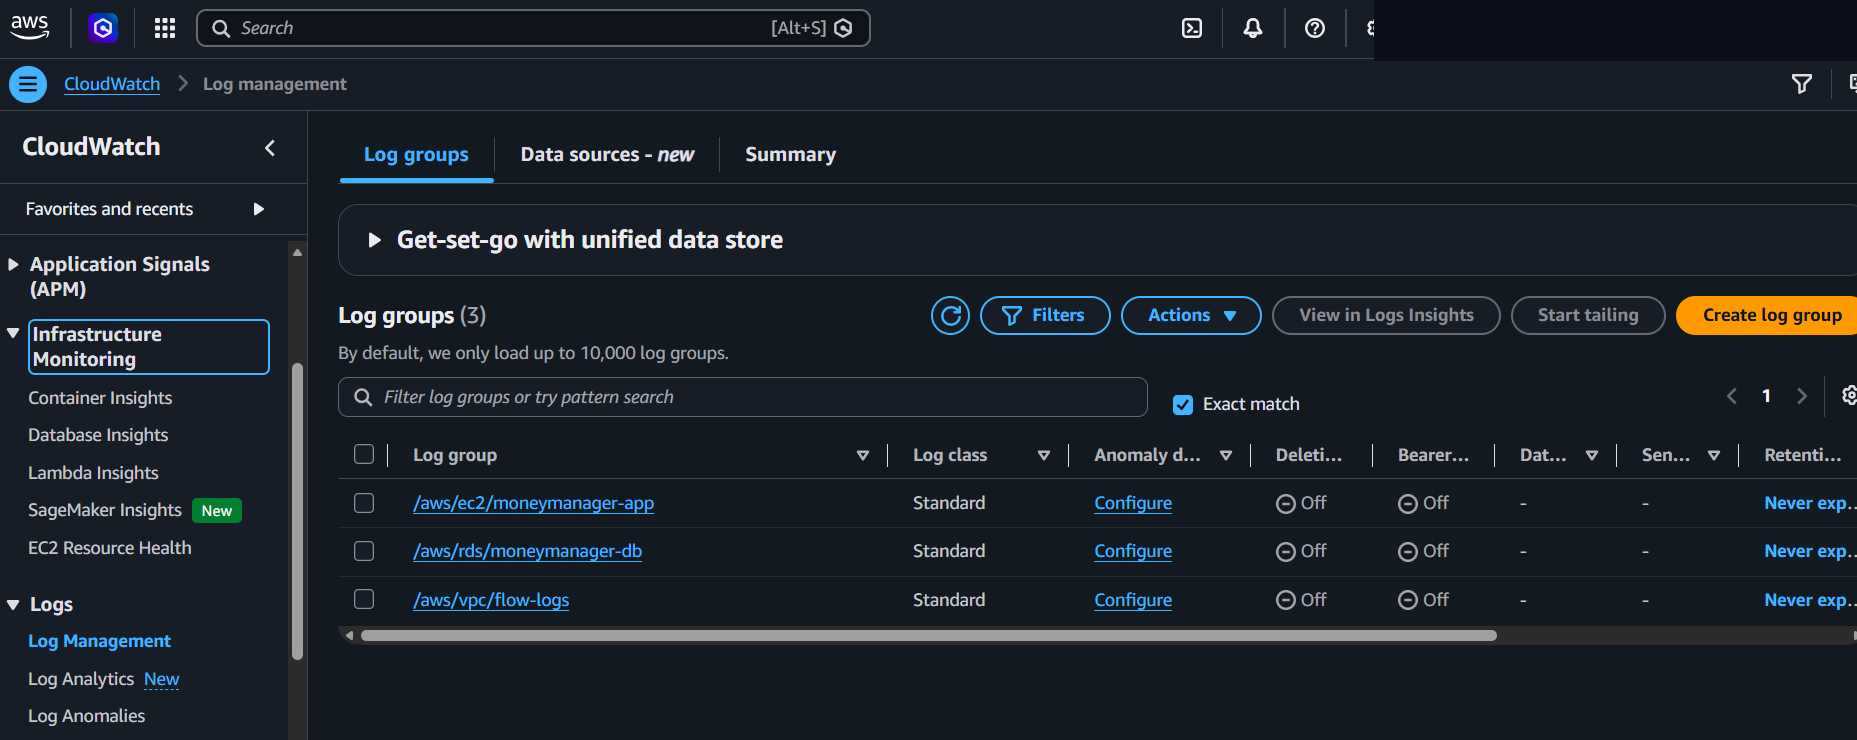
- Configure a Log Appender in the Spring Boot application (using the AWS Logback Appender library) to automatically push operational logs from the API and Worker containers to the CloudWatch Log Group
/aws/ec2/moneymanager-app. RDS MySQL error logs (/aws/rds/moneymanager-db) and VPC network flow logs (/aws/vpc/flow-logs) are also pushed to separate Log Groups, enabling centralized system-wide monitoring in one place.
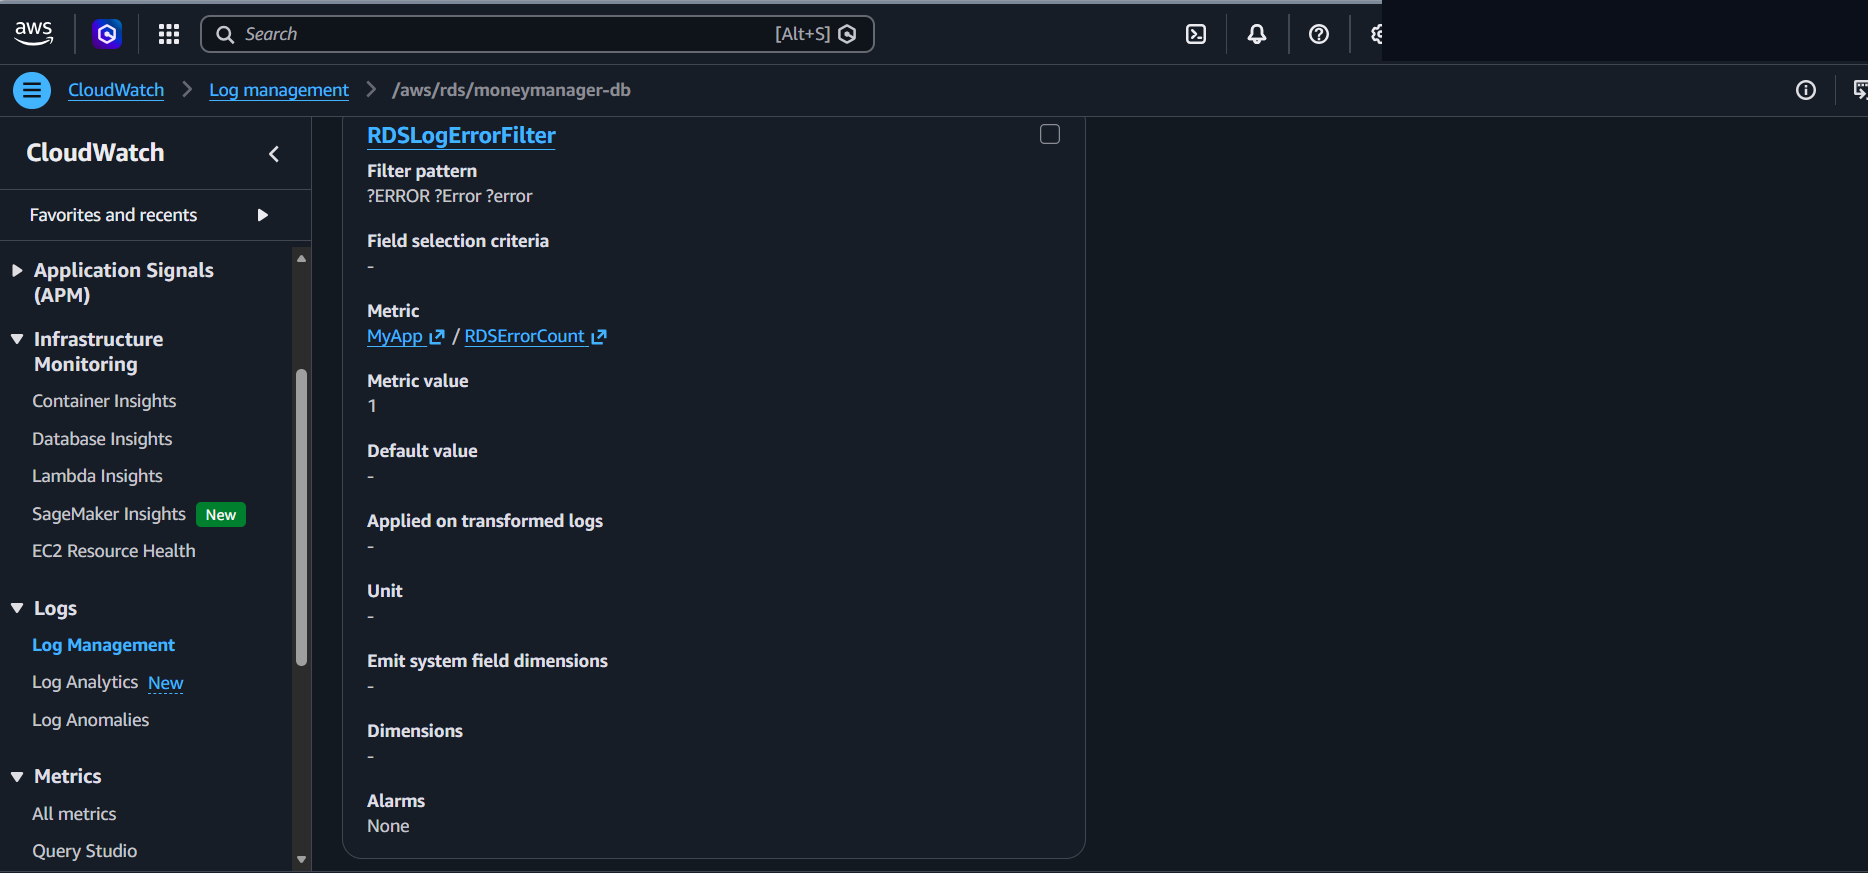
- Set up a Metric Filter named
EC2ErrorFilteron the Log Group/aws/ec2/moneymanager-appto scan through log streams and count the frequency of critical errors (matching patterns such asERRORorException), emitting a custom metricEC2ErrorCount. A similar filter namedRDSLogErrorFilteris also configured on/aws/rds/moneymanager-dbto track error frequency at the database layer.
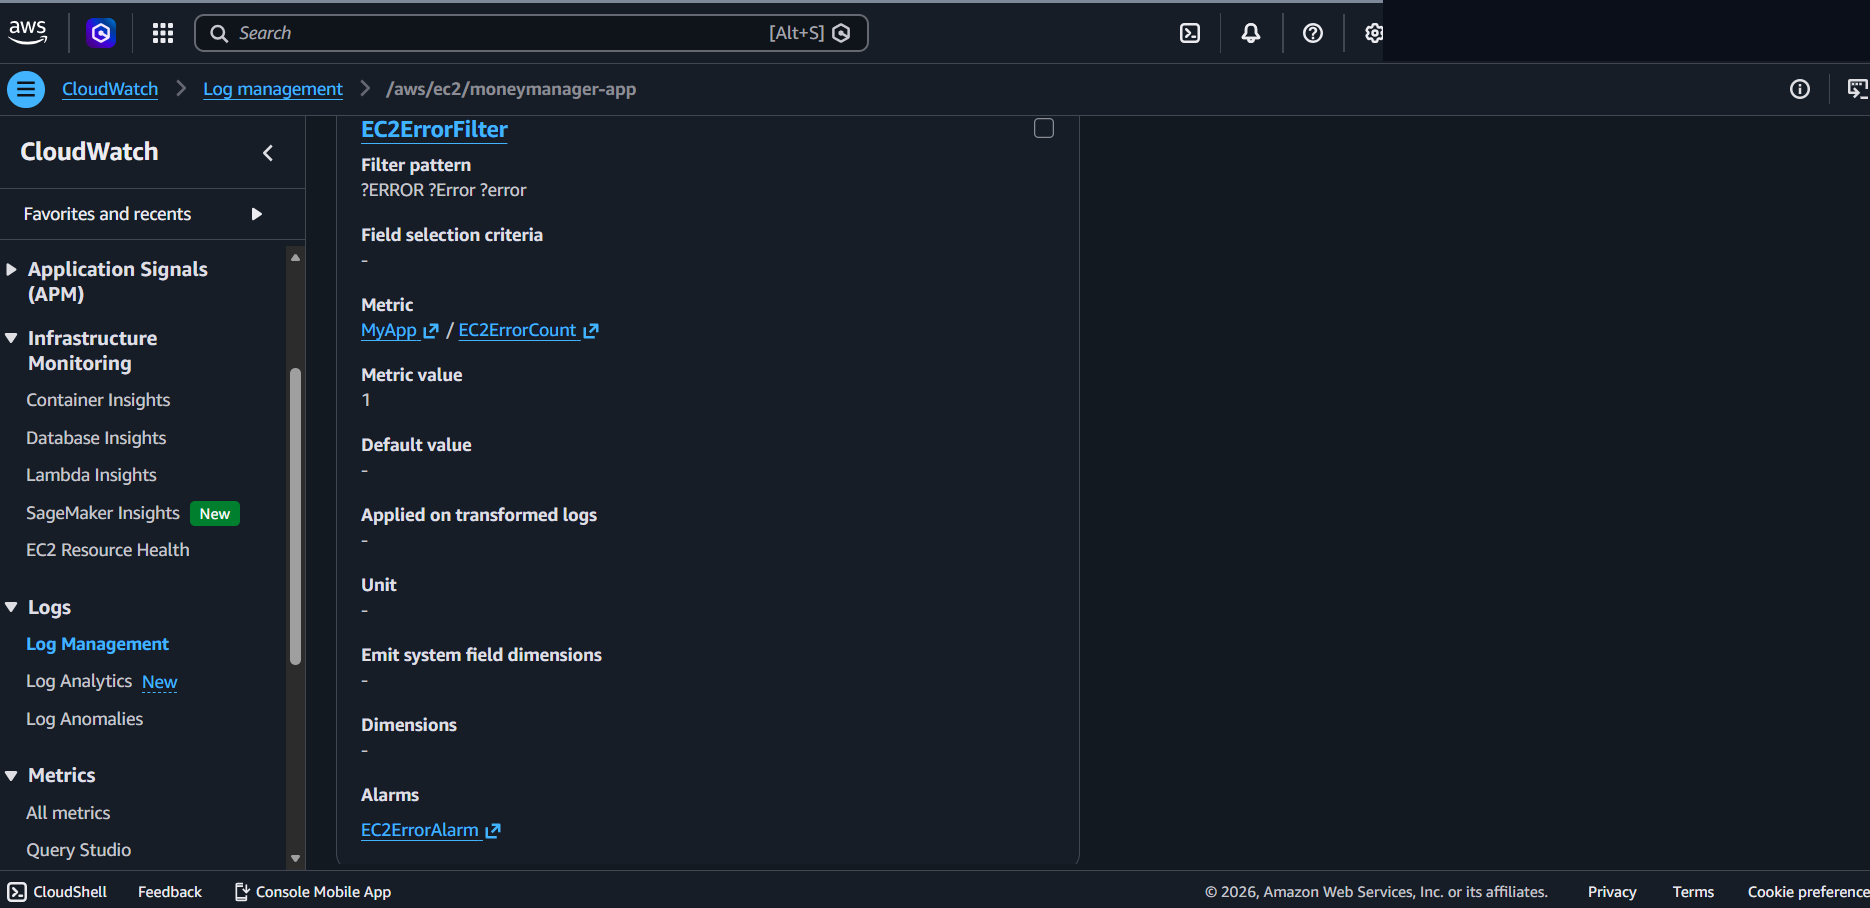
- Configure a CloudWatch Alarm named
EC2ErrorAlarmbased on theEC2ErrorCountmetric, transitioning toALARMstate when the error count reaches 1 or more within 5 minutes, automatically sending notifications via SNS.
<!-- logback-spring.xml -->
<configuration>
    <appender name="CLOUDWATCH" class="ca.pjer.logback.AwsLogsAppender">
        <groupName>/aws/ec2/moneymanager-app</groupName>
        <streamName>backend-logs</streamName>
        <regionName>ap-southeast-1</regionName>
        <layout>
            <pattern>%d{yyyy-MM-dd HH:mm:ss.SSS} [%thread] %-5level %logger{36} - %msg%n</pattern>
        </layout>
    </appender>

    <root level="INFO">
        <appender-ref ref="CLOUDWATCH" />
    </root>
</configuration>
See the overall architecture diagram in 5.1 Introduction for a better understanding of how these components connect.